The Flash series radios are so-called because they store model settings in a 93C46 "Flash" EEPROM (Electrically Erasable Programmable Read Only Memory) which has 64 Bytes of storage capacity. I wired another EEPROM chip on top of the original one. This new chip provides storage for two extra model memories.
The microprocessor generates a 'Chip Select' signal, which needs to be routed to the CS input (pin 1) of the selected EEPROM. The other EEPROM must have its CS input tied to ground. A DPDT slide switch does the routing. Power and data in/out signals are commoned to both chips (note that pins 6 and 7 are not used).
Installing the Memory Doubler
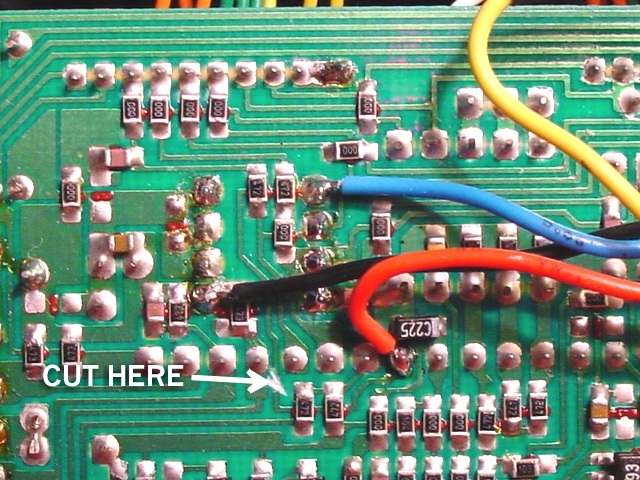
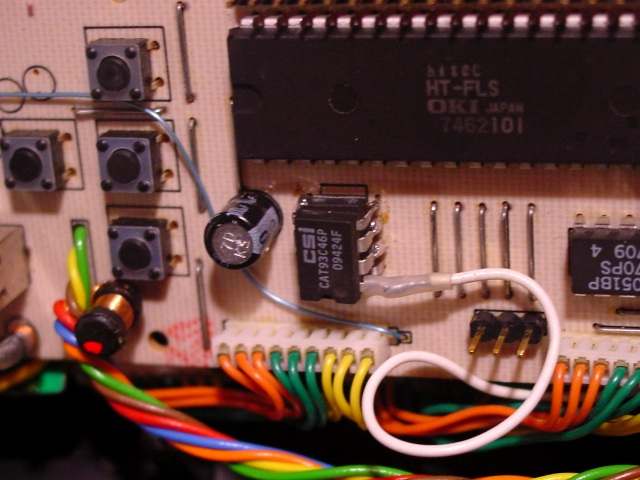
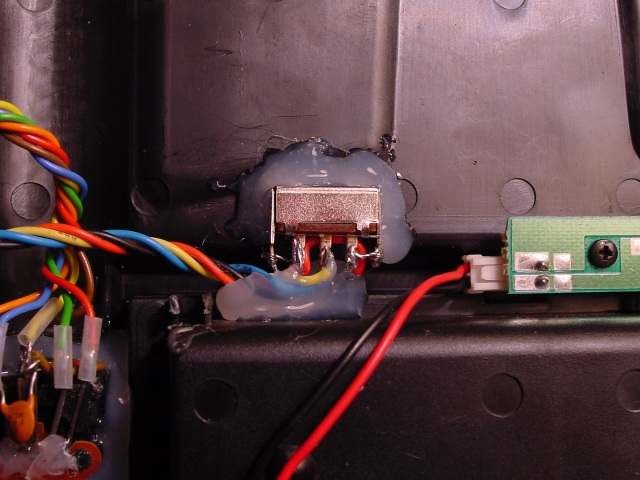
Cut the PCB trace between the EEPROM and MPU at the point shown. Remove the LCD display from the front of the PCB. You should see the EEPROM chip next to the MPU (marked '93C46'). Now take your new EEPROM chip and bend out pin 1, so that it is horizontal. Solder pins 2,3,4,5 and 8 onto the same pins of the existing 93C46. Solder a wire onto pin 1 of your new chip, long enough to reach the slide switch. Now wire the switch according to the circuit diagram. Mount the switch in a convenient location, where it is accessable but cannot be accidentally operated. To prevent RF pickup from the antenna, twist the wires going to the switch. Try to minimise wire length, and keep the wiring away from the antenna.

Initializing the New Memory
Before using the new model memories you need to clear the EEPROM and calibrate the sticks. You invoke Factory Setup Mode by turning on the radio while operating a hidden pushbutton switch. To access this switch you can either drill a hole in the front panel (just to the right of the DOWN/TIMER button), or short out the switch from the back of the PCB.

In Factory Setup Mode, menus are selected using the UP and DOWN/TIMER buttons. Pressing UP repeatedly will cycle through the following options:-
Failure to calibrate the sticks properly can cause some really wierd effects. After fiddling for some time trying to get it right, I found an easier way:- just go into Factory Setup Mode with the Model Select switch set for 1-2, then change to 3-4, and do a Reset EEPROM. This copies the original factory settings into the new chip!
NOTE: In normal operation, you must NOT operate the Model Select switch while the radio is on! (unless you really want to overwrite one model with another...). To avoid accidental switch operation, I cut my switch lever down flush with the case.
If you fly Mode 2, you will need to change to Mode 2 for each of your two new models, since Factory Reset always puts the radio into Mode 1. In case you have forgotten how to change stick mode, the procedure is as follows:-